IU Campaign Builder – Install Your Template
Tips
- Use the Installer tool to install the Campaign Template in your WCMS site with just a few clicks, saving you from the cumbersome process of configuring the content type manually.
- You must have site manager access in the WCMS to install the Campaign Template.
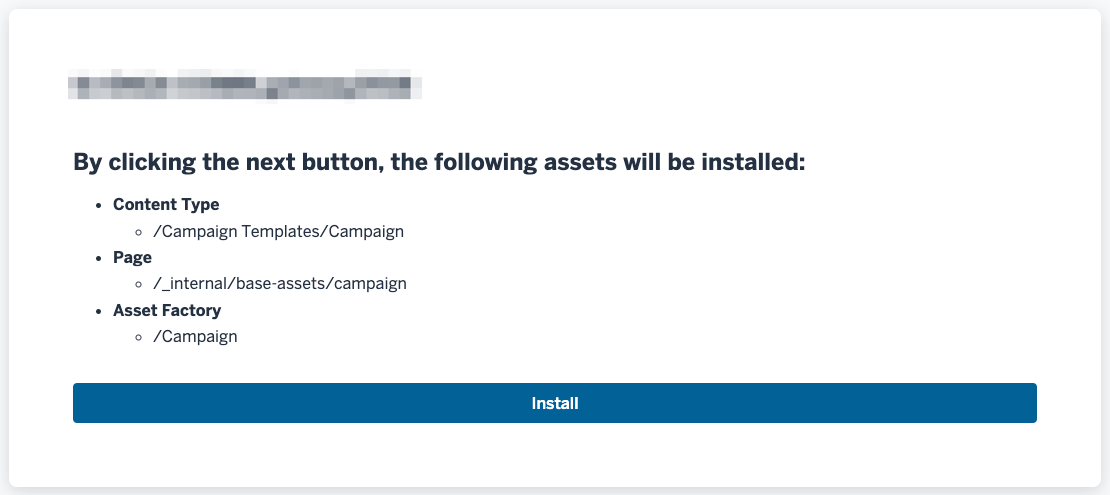
- When you install the Campaign Template, the following assets will be created in your site:
- A content type
- A page
- An asset factory
How-to guide
Using the Installer tool is simple. Follow these steps:
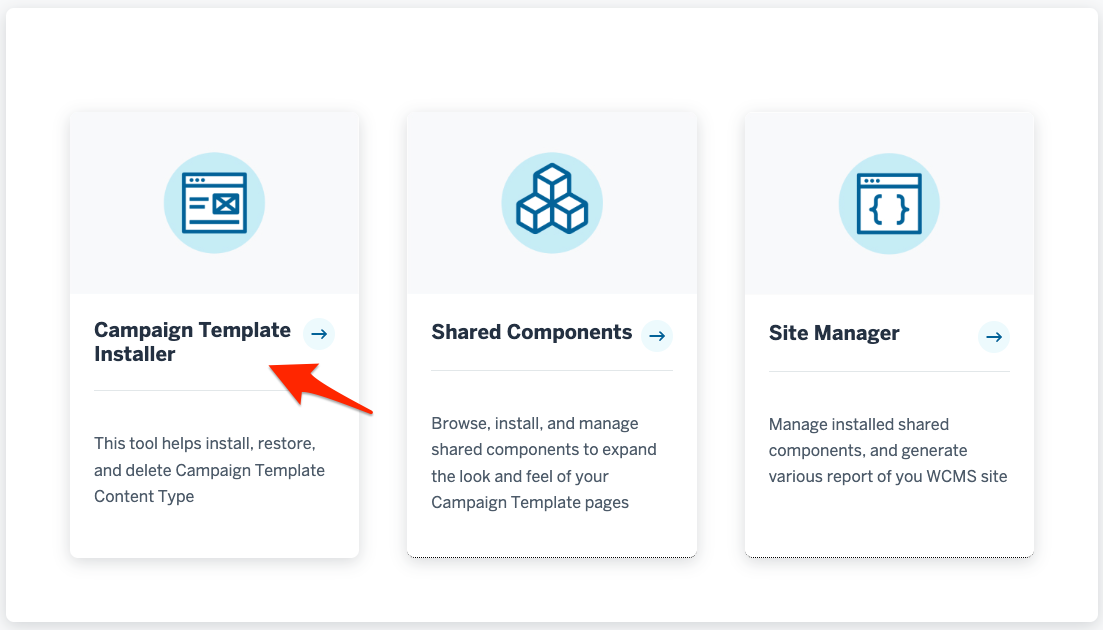
- Visit the tool online and click Campaign Template Installer.
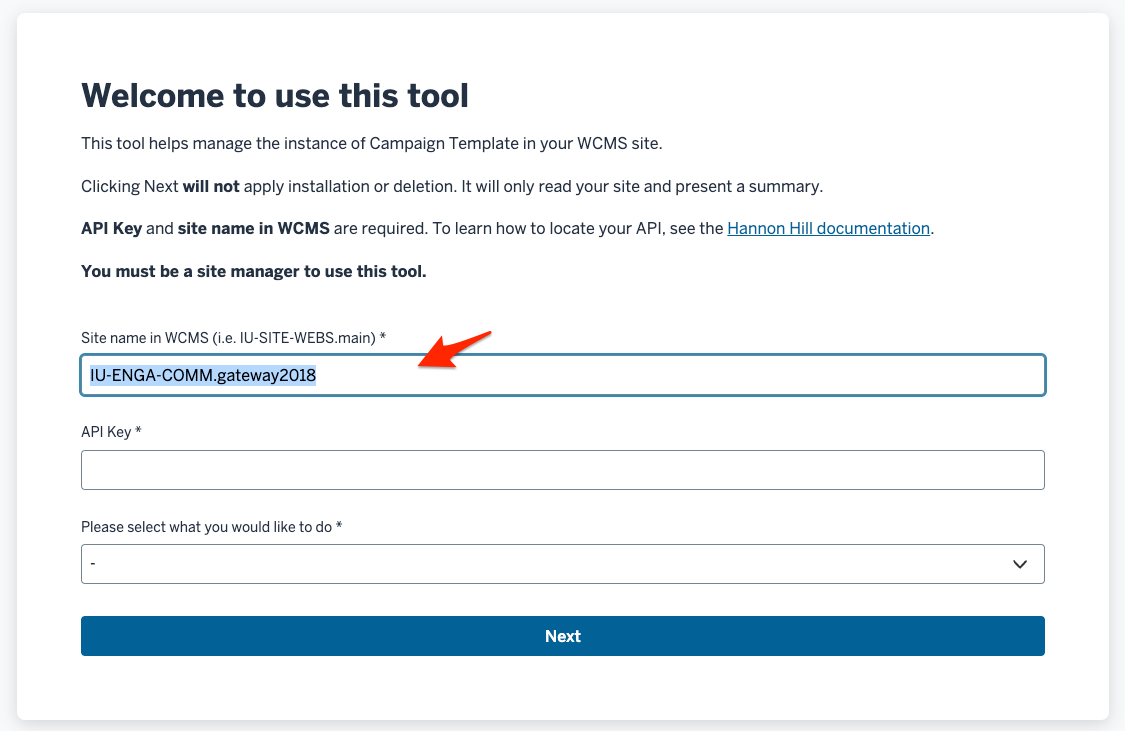
- Input your site name.
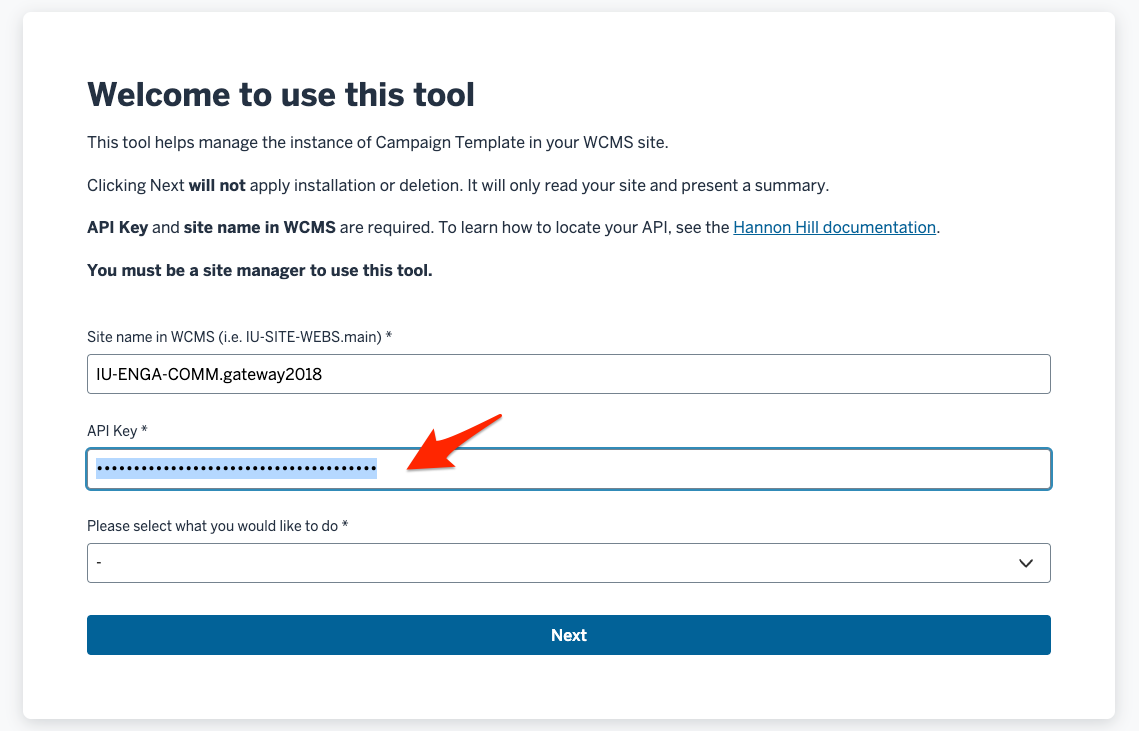
- Generate your API Key and input it in the second field.
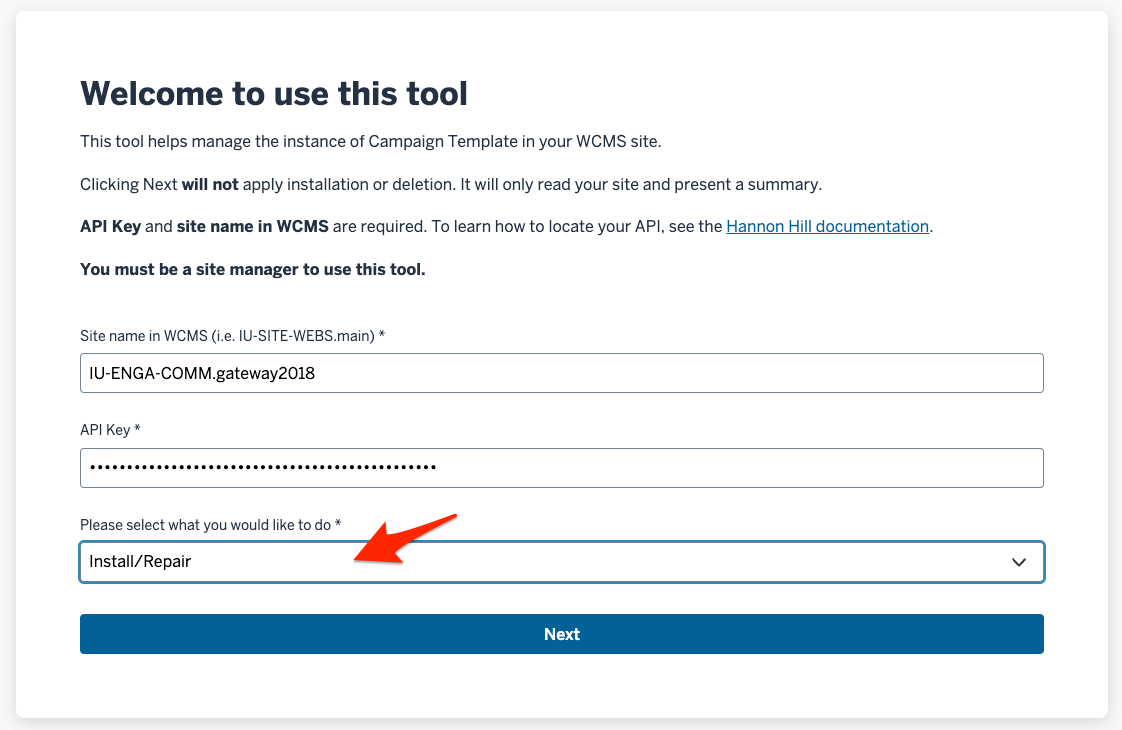
- Choose Install/Repair as your action in the dropdown. (NOTE: Go to the uninstallation page to learn about how to remove the Campaign Template from your site.)
- Click Next. Doing so won't make any changes to your site; it will just present you with a summary of your intended changes. Review the summary, and if all looks correct, click Install.
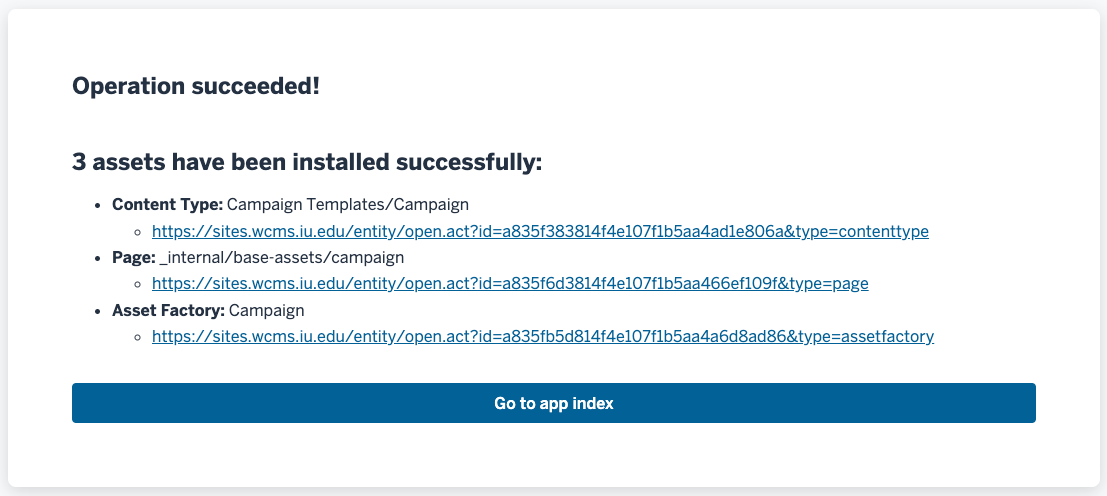
- An installation summary will show up when the task is complete.
Contact us
We look forward to your feedback!
-
Questions
Email your questions to dccamp@iu.edu.
-
Bug report
Help improve the Campaign Template by submitting a bug report to github.iu.edu.
-
Feature request
Help make the Campaign Template better fit your needs by submitting a feature request to github.iu.edu.