IU Campaign Builder – Use Local Overrides in WCMS
Tips
- A local override is basically a local Velocity format that follows a certain naming convention and exists in a specific directory in the WCMS site.
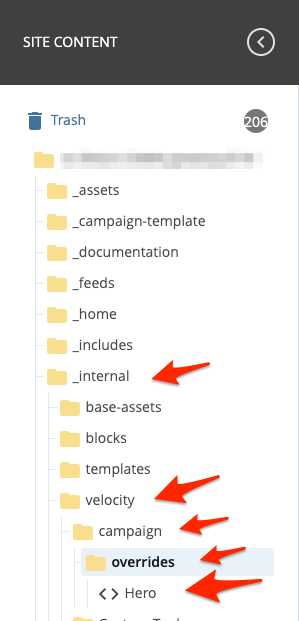
- All local overrides should be created in the _internal/velocity/campaign/overrides folder in your site. If this folder doesn't already exist, create it.
- Coming soon:
- The Campaign Template Community Hub, where you can find out if someone else has already created a local override that will suit your needs.
- An Automate tool to help install local overrides, including creating the folder if it doesn't exist.
Note: A developer familiar with Velocity scripting may be needed to write local overrides.
How-to guide
Follow these steps to create a local override:
- Create a Velocity format in the _internal/velocity/campaign/overrides folder and name it after the name of the component that will be overridden.
- Go into Edit mode for the component that will be overriden, select the "Allow override?" checkbox in the Component chunk, and submit the page.
The system will render the component according to the Velocity format you created.
Example
For this example, the following conditions exist:
- You have a campaign page that contains a Hero component.
- You want to add background color to the image area in the hero.
- You have created a custom Velocity format that adds a background color for the image area. The difference between the custom format and the original one is that the original doesn't have an option for a background color for the image area.
Before customization:

After customization:

Steps for this override are as follows:
- Check if the _internal/velocity/campaign/overrides folder exists in your site. If it doesn't, create it.
- Create a Velocity format named Hero (case sensitive) in _internal/velocity/campaign/overrides:
- Click Add Content > Default > Format.
- Choose Velocity instead of XSLT as the format type in the window that appears.
- Name the file Hero (case sensitive), because that is the name of the component you are going to override.
- Input your custom Velocity script. In this example, the only difference between the custom Velocity script and the original one is that rvt-bg-black-100 is added to the image's background area.
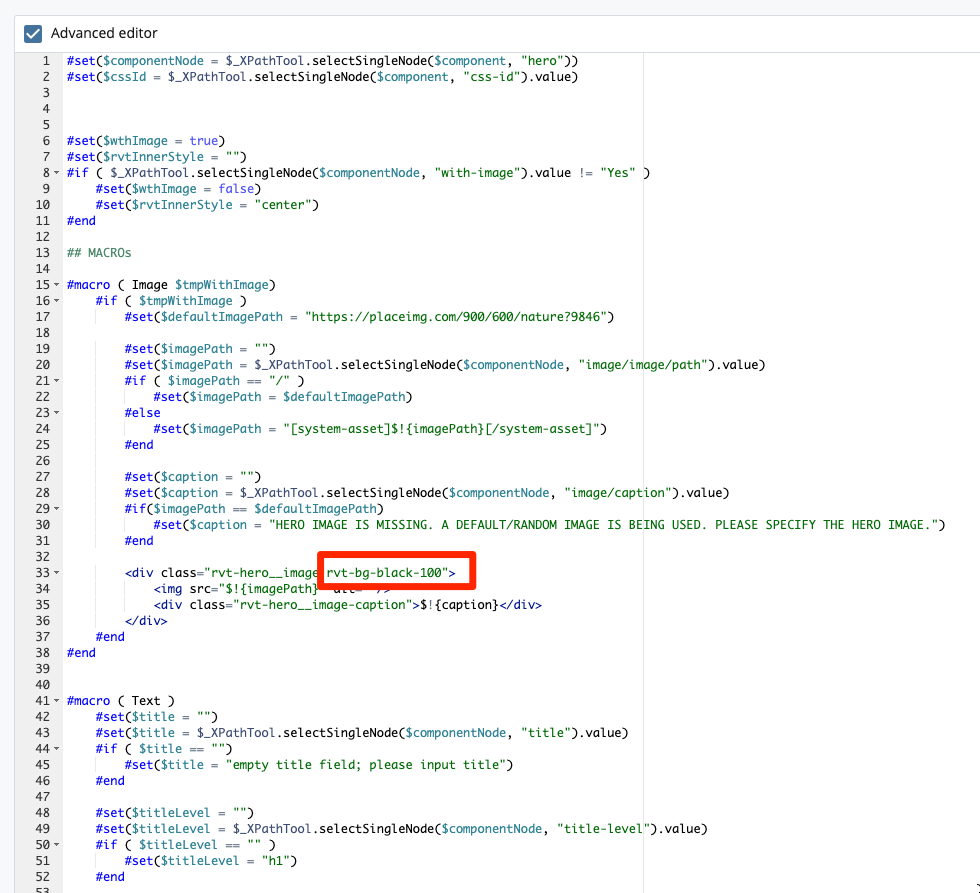
- Submit the file.
- Use Edit mode to open the page for the component where you're applying the local override (here, the Hero component).
- Select the "Allow override?" checkbox under the "name" dropdown.
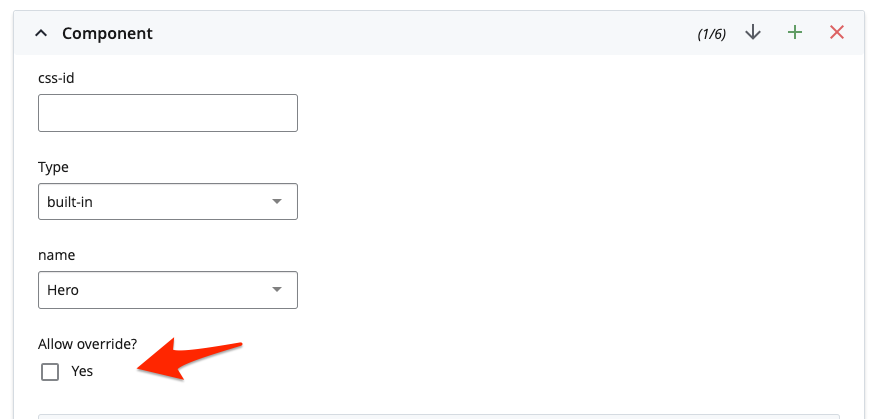
- Submit the page, and the customization should take place.
Too much trouble?
No worries. We understand the importance of customization for campaign pages, and we already have a plan for an Automate tool to install and manage local overrides with just a few clicks. Stay tuned!
Looking for a more-powerful solution?
If you need changes in data definition or want to rework a component, the Shared Component option might be a better choice.
Contact us
We look forward to your feedback!
-
Questions
Email your questions to dccamp@iu.edu.
-
Bug report
Help improve the Campaign Template by submitting a bug report to github.iu.edu.
-
Feature request
Help make the Campaign Template better fit your needs by submitting a feature request to github.iu.edu.